Here’s how you can create a rechargeable 9V power supply for your guitar pedals, so you don’t have to juggle individual 9V batteries, bother with having to unscrew the back off of pedals without battery hatches, or hunt for another electrical outlet and deal with an extension cord when playing out, especially if your pedals are conventional 9V pedals drawing modest current from a typical 5.5mm x 2.1mm, center-negative AC adapter. Or, as in the case of my mod to convert the MXR Micro Amp to true bypass switching, if a mod to one of your pedals makes it so that you can’t fit a 9V battery in the pedal anymore, and hauling a wall-powered power supply, even one as small as the T-Rex Fuel Tank Jr., would be a PITA when you only want to take it and your Boss TU-3 Chromatic Tuner to a blues jam. Or if you have a modest number of pedals, but you’re haunted by ground loop hum, a problem completely eliminated by battery power.
This idea is shamelessly stolen from Charles#5’s post in The Gear Page thread "Building a battery powered pedalboard", but I thought I’d provide the service of listing out all the parts and steps in one self-contained article. Again, the usual disclaimer: I take no responsibility for the success or failure of anyone else’s attempt to replicate the process below! This is especially true if you end up plugging something in the wrong way and bricking any pedals, or making the batteries explode, or burning your house down with a misplaced soldering iron, etc.
Components and Ratings
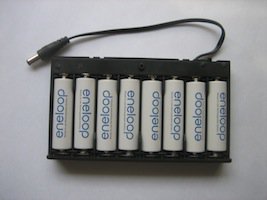
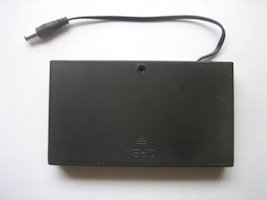
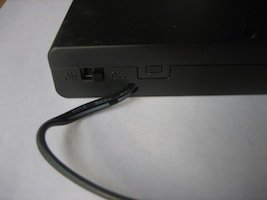
The housing is an 8 x AA cell holder with an on/off switch available from Adafruit in the US.1 The cells are Sanyo Eneloop NiMH batteries which I ordered from Amazon.
Something to note is that normal AA cells are 1.5V a piece, which would render this a 12V supply. However, the Eneloop cells are only 1.2V a piece, for a total of 9.6V. Though most effects are explicitly rated for 9V rather than 9.6V, supplies on the order of 10V are no problem for 9V guitar effects.
It’s also worth noting that this supply will provide ~2k mA, which is way more than enough for most pedals. The mA rating is published in the manual for most pedals, with fuzz/distortion/overdrive pedals drawing very little current, and modulation and delay pedals drawing significantly more, but only on the order of the low hundreds of milliamps, generally. So using the formula from the Street Musician battery calculation page, how long can I expect this supply to power my Boss TU-3 (30mA) and Micro Amp (guessing 10mA)2? Using Python as our calculator:
>>> def BatteryLifeInHours(battery_amp_hours, current):
...     return float(battery_amp_hours)/current
...
>>> BatteryLifeInHours(2000, 30 + 10)
50.0
Bear in mind that most pedals won’t draw their full current, if any, when bypassed, and many current ratings are overcompensated to represent the peak draw, rather than the average. Also, as the Street Musician page goes on to illustrate, there are other factors affecting battery life, but given the relatively low-power requirements of guitar effects, the high-level calculation above likely does well enough. So 50 hours may be considered a lower bound, more or less. That’s many a blues jam right there!
For kicks, let’s throw on a couple of digital pedals drawing 300mA a piece (like the TC Electronic Nova Modulator and Nova Delay):
>>> BatteryLifeInHours(2000, 30 + 10 + 300 + 300)
3.125
Plenty to get through a single blues jam or other typical gig. But there’s not too much need for modulation and delay in a blues jam, for me, anyway.
If you’re intrigued to learn more about pedal current draw and related issues, check out the “Current Draw on pedals??” thread on the Seymour Duncan forum.
Flip It For Real
Now if all there was to this project was ordering a case and batteries and plugging ’em in, that’d make life easy—and boring. Turns out this housing, as with most battery housings, is wired such that the DC plug is center-positive—and most guitar pedals require center-negative power supplies.3 So before we can actually move forward with using this battery pack, we need to rewire the contacts in the opposite order.
But don’t take my word for it; first use a multimeter to determine the polarity of the DC plug with the batteries installed in the pack. A picture of such a measurement confirming the end result is below, but the rule is, if the voltage reading is positive, the red/positive meter probe is touching the positive contact; otherwise it’s touching the negative contact. And when you first do this to this particular plug, you should confirm that the center of the plug is indeed positive.
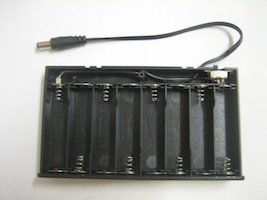
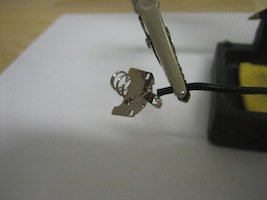
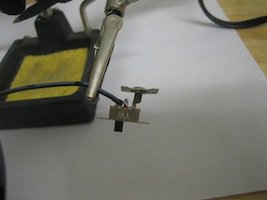
Now on to the show! Though you should take utmost care with every step, the process is super-easy. Carefully pop off the strip covering the switch and wire contact with a small screwdriver. Then, just as carefully, use needle-nose pliers to pull out the battery contact connected to the power cable, as well the on/off switch.
Use your soldering iron and desoldering braid to free the wire from the existing contacts, and rewire each half of the wire back to the other piece. Fastest, easiest resoldering job ever! Now recheck the polarity of the finished product:
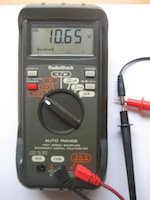
When finished, you want to see a positive voltage when the red/positive probe is
touching the outside of the plug and the black/negative probe is touching the
inside. Click for a larger image.
The reading here is 10.65V, but bear in mind the batteries are brand new and fully-charged, and there’s no load attached to the power supply. Regardless, 10.65V poses no threat to any effect pedal.
Fire It Up!
The time has come! Plug in one of your pedals and confirm that it’s getting ample juice:
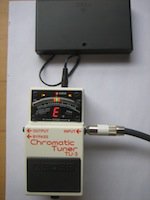
Here I chose the TU-3, since it has lots of pretty
blinkenlights fur das
foto. Click for a larger image.
Of course, such a juicy supply would be wasted on a single pedal; you’ll want a daisy chain cable such as the Godlyke 5-point daisy chain, or the One Spot 8-point daisy chain.
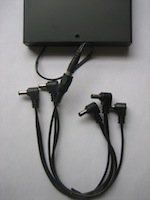
Our power supply with a Godlyke 5-point daisy chain cable attached. Click for a
larger image.
I find the 5-point Godlyke daisy chain is perfect for my Pedaltrain Nano, on which I can fit about four pedals, with my FrakenBaby wah pedal on the side.
Caveats
Aside from being mindful of the total current draw and expected battery life, the number one thing to watch out for is this:
Don’t power center-positive pedals with this—unless you use a reverse polarity adapter!
That means most of your Germanium-based fuzz pedals are right out, unless you use the adapter. Otherwise, none of the pedals will power, and you could do some damage to some of them, especially the center-positive ones.
You may have noticed that, well, yes, you could probably get the adapter and plug that into the battery pack’s cable to reverse the polarity rather than bothering with soldering in the first place, but where’s the fun in that?
A related caveat:
Don’t power positive-ground pedals with this—unless your pedals are all positive-ground (which is very unlikely)!
I was reminded of this when I tried to power my Foxrox CC Hybrid Fuzz using the daisy chain. As stated in the CC Hybrid manual, you can use power supplies with isolated outputs such as Voodoo Lab power supplies (which I use on my Pedaltrain PT-2), or the T-Rex Fuel Tank Jr. (which I use in my Pedaltrain Mini and Nano), and it’ll play just fine with all your other pedals hooked up to the same unit, without the need for any adapters. But daisy chains are right out.
Now, the battery pack will power the CC Hybrid by itself just fine. No, I don’t understand all the reasons why just yet. But daisy chaining it along with the rest of my pedals left them all powerless. Fortunately, none of them appear to have cooked themselves silly; won’t be making that mistake again!
Wrap-up
So how much did the whole package cost? $5.95 for the battery holder + $4.04 shipping, $18.32 x 2 for the Eneloop batteries with chargers, and $7.50 for the Godlyke daisy chain (the batteries and daisy chain meeting the Amazon free shipping minimum). So in total: $54.13. Much less than the existing Sanyo Pedal Juice, and possibly less than the upcoming Pedaltrain Volto. If you don’t yet have a multimeter, soldering iron, and other tools and supplies, there’s a little more up-front investment for those things. But if you plan to keep hacking, those costs are amortized across however many projects you care to undertake, of course.
You should now have in your possession a handy, powerful, portable, rechargeable 9V power supply to carry with you on small—hell, maybe even large—gigs, without being encumbered by either a horde of individual 9V batteries or the need to scurry about and discover AC power and route a power cable to the wall. Ground loop hum will be a non-issue. When it comes time to tear down and avoid keeping the power engaged, you won’t need to deal with unplugging the daisy chain or the plugs from the effect input jacks, either—just flick the on/off switch. Just don’t forget to use the multimeter periodically to check the charge, or for extra credit, find a way to wire in a LED voltage meter to keep an eye on the charge at all times.
So hope all that’s proved fun and useful. Now pack up your new power supply, your favorite pedals, go forth, and rock!
Footnotes
-
The link Charles#5 provided to the shop in Belgium appears to be dead. ↩
-
This guess is based on the CAE Boost/Line Driver, a similar Jim Dunlop product, since the draw isn’t published in the Micro Amp manual. I could try to measure the actual current draw with a multimeter, but I’m too lazy. ↩
-
Fuzzes based on Germanium PNP transistors being the most notable exception. All modern pedals have a label next to the DC input jack illustrating the positive and negative contacts. ↩
